At some point, standard push-ups become warm-up territory. You can knock out twenty or thirty without much effort, and the last few reps are not genuinely hard. This is not a problem. It means the basic training worked.
The problem is what happens next. A lot of people reach that ceiling and either switch to weights or keep doing the same easy push-ups and wonder why their progress has stalled. Neither is necessary. Bodyweight training has a depth that most people never reach because the standard progressions are not widely taught.
Here is what comes after the basics, why these movements are worth learning, and how to build toward them systematically.
When to Advance#
A rough readiness benchmark for the movements in this article:
- Twenty or more push-ups with solid form (no sagging hips, full range of motion)
- Ten or more pull-ups (for any pulling progressions)
- Thirty or more bodyweight squats without fatigue
- Thirty-second L-sit hold for core prerequisite work
If you are not there yet, the progressive overload article covers how to build toward these numbers systematically.
Advanced Upper Body Push Progressions#
The push-up is a horizontal pressing movement. Standard push-ups eventually become too easy because your bodyweight divided across two limbs does not change. Advancing requires either shifting more load to fewer limbs, changing the angle to increase difficulty, or creating a mechanical disadvantage for your muscles.
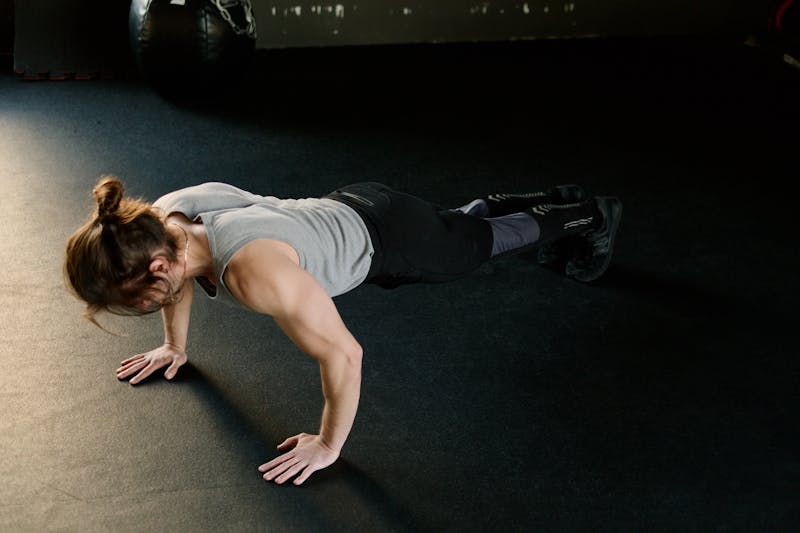
Archer Push-Up#
Set up in a wide push-up stance. Lower toward one hand by bending that elbow while keeping the opposite arm straight. Both hands stay on the floor, but the straight arm provides minimal assistance as you push back up to center. Alternate sides.
The archer push-up shifts the majority of the loading onto one arm at a time, making it a direct progression toward the single-arm push-up without the sudden skill jump. It also challenges shoulder stability in a different plane than standard push-ups.
Start with three sets of four to six reps per side, and notice how much more demanding this is than a comparable number of standard reps.
Diamond Push-Up#
Hands close together forming a diamond shape under your chest. This shifts the primary load from the pectorals to the triceps and inner chest. Research on push-up variations has consistently found that hand position changes muscle activation patterns significantly, with narrow-grip variations producing substantially higher triceps activation.
If you can do twenty standard push-ups, expect to manage eight to twelve diamond push-ups at first. That is the correct response.
Pike Push-Up (Toward Handstand)#
Elevate your hips into a pike position (downward-dog shape) and lower the top of your head toward the floor between your hands. This is a vertical pressing movement that trains the shoulders in a way horizontal push-ups do not.
The pike push-up is a prerequisite to the wall-supported handstand push-up, which is one of the most demanding overhead pressing movements in bodyweight training. Start on the floor, then elevate your feet on a chair to increase the angle as the floor version becomes manageable.
Single-Arm Push-Up Progression#
The full single-arm push-up is a significant skill goal. The progression:
- Single-arm push-up on a raised surface (hands on a counter or bench). The elevation reduces the load.
- Archer push-up: load shifts to one side while the other assists.
- Single-arm push-up with feet wide: a wider stance base reduces the rotational stability demand.
- Full single-arm push-up with feet together.
Each stage should feel genuinely hard. If stage one is easy, you are not ready for stage two.
Advanced Upper Body Pull Progressions#
These require a pull-up bar. If you do not have one, the jump rope and pull-up bar guide covers the doorframe options that run twenty-five to thirty-five dollars and require no drilling.
Archer Pull-Up#
Wide grip, lower toward one hand by bending that elbow while keeping the opposite arm relatively straight (allowing it to slide inward along the bar). Alternate sides.
Like the archer push-up, this is a step toward the single-arm pull-up that develops unilateral strength without the full skill jump.
L-Sit Pull-Up#
Perform a pull-up while holding your legs straight out in front of you at hip height, forming an L shape with your body. This dramatically increases core and hip flexor demand while maintaining the same pulling motion.
Prerequisite: a solid hanging L-sit hold (legs parallel to the floor, held for five or more seconds) before attempting the full movement.
Slow Negative Pull-Up#
Jump or step to the top of the pull-up position (chin over bar) and lower yourself as slowly as possible over five to eight seconds. Slow eccentrics produce high levels of muscle tension and adaptation. Three sets of three to five very slow negatives can be more productive than twelve fast standard pull-ups.
Advanced Lower Body Progressions#
Pistol Squat (Single-Leg Squat to Full Depth)#
The pistol squat requires single-leg strength, hip mobility, and ankle mobility simultaneously. Most people who struggle with pistol squats have a limitation in one of these three areas rather than insufficient strength.
The progression:
Box pistol: Sit onto a box or chair using one leg while keeping the other extended. Stand back up on one leg. Lower the box height as the movement becomes comfortable.
Assisted pistol: Hold a doorframe or pole with one hand for balance assistance. Perform the single-leg squat to full depth. Reduce the amount of assistance over time.
Full pistol: No assistance, full depth, extended leg held straight forward. This is the goal.
A note on the extended leg: the forward leg needs to stay elevated and extended throughout the movement. This requires meaningful hip flexor and quad control, and it is often where people first get stuck.
Shrimp Squat (Rear-Foot-Elevated Single-Leg Squat)#
Grab one foot behind you (as if stretching your quad) and lower into a single-leg squat on the other leg. The rear foot is elevated behind you rather than held forward as in the pistol. This version emphasizes hip mobility and quad strength in a different way.
Some people find the shrimp squat more accessible than the pistol because it does not require the same degree of hip flexor strength to hold the front leg forward.
Advanced Core Progressions#
L-Sit Hold#
Sit on the floor with legs straight. Place your hands on the floor beside your hips and press down to lift your hips and legs off the floor, holding your legs parallel to the ground.
This is genuinely hard. The L-sit is considered an advanced calisthenics movement because it demands full-body tension: shoulder depression, tricep engagement, core compression, and hip flexor strength simultaneously.
The progression:
- Tuck L-sit (knees bent, feet off floor): hold ten to fifteen seconds
- One-leg extended (one leg straight, one tucked): hold ten seconds per side
- Full L-sit (both legs straight): work toward ten-second holds, then builds from there
Hollow Body Hold#
Lie on your back, press your lower back into the floor, and simultaneously lift your shoulders and legs off the floor. Arms extend overhead. The goal is a slight C-curve in the spine with the lower back in contact with the floor throughout.
Research in gymnastics and calisthenics coaching identifies the hollow body position as the foundation for nearly all advanced upper body skills. It trains the anterior core in the specific activation pattern used in handstands, L-sits, and bar skills.
Start with knees bent and gradually extend the legs lower as you can maintain the lower back contact. Time the hold and add time progressively.
Ab Wheel Rollout#
With hands on an ab roller, extend from a kneeling position as far as you can while keeping a neutral spine, then pull back. Research published in the Journal of Orthopaedic and Sports Physical Therapy found that ab rollouts activate the rectus abdominis at significantly higher levels than crunches or sit-ups.
This is not a beginner movement. If you have not built solid plank and hollow body tolerance, the ab rollout tends to load the lower back instead of the core. Earn the prerequisite strength first. The full equipment breakdown is in the jump rope, pull-up bar, and ab wheel article.
How to Structure Advanced Bodyweight Training#
The common mistake at this level is adding too many new movements at once. Pick one or two progressions per session to develop. Everything else can be maintenance work.
A sample session structure:
Skill work (10 to 15 minutes at the start, when you are fresh)
- One pressing progression (archer push-ups, pike push-ups)
- One pulling progression (archer pull-ups, L-sit pull-ups)
Volume work (main session)
- Two or three sets of the advanced pressing movement
- Two or three sets of the advanced pulling movement
- Lower body progression (box pistol, shrimp squat)
- Core progression (hollow body, L-sit holds)
Maintenance work
- Standard push-ups, rows, or other established movements you want to keep
Total time: 40 to 50 minutes.
The Honest Difficulty Curve#
These movements take longer to develop than most people expect. Expecting to go from regular push-ups to archer push-ups in a week is unrealistic. Expecting to develop a pistol squat in a month is realistic for many people. An L-sit on the floor takes most people two to four months of consistent work.
The timeline matters less than the direction. These are movements with real technical depth, and the process of building toward them is itself useful training. A person who has been working toward a pistol squat for three months is building single-leg strength, hip mobility, and body control regardless of whether the full movement is there yet.
Do this today: Test the archer push-up. Get into a wide push-up position, lower toward one hand while keeping the other arm straight, and see how many reps you can complete with honest form on each side. That number tells you more about your current strength baseline than any amount of standard push-ups.